5 Fun 4th of July Nail Art Ideas

What better way to complete that perfect 4th of July outfit than with festive fingers? The possibilities are endless, but here are a few ideas to get you started. Grab your patriotic polish and let freedom ring!
We review and recommend products to help you buy the stuff you need. If you make a purchase by clicking one of our links, we may earn a small share of the revenue. Our picks and opinions are independent from any business incentives.
These are the colors I used, but any shade of red or blue will do the trick!
Sinful Colors - Ruby Ruby
Sally Hansen Insta-Dri - In Prompt Blue
O.P.I - Alpine Snow
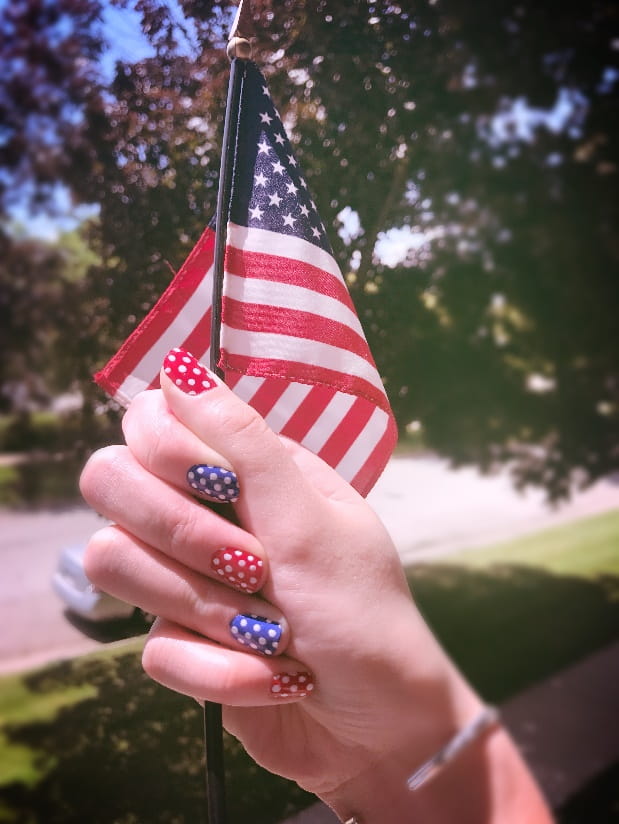
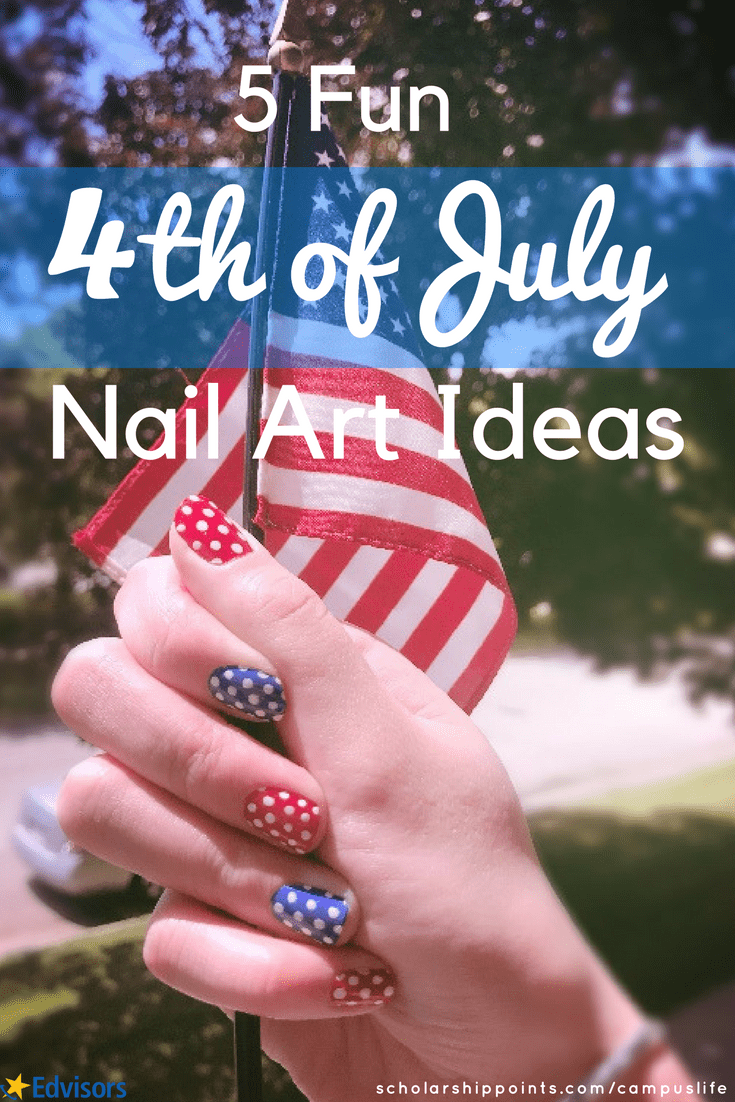
Polka dots are easy, classic, and cute! Alternate red and blue fingers for a base, using white or silver polish for polka dots. If you want to switch it up, use a white base and alternate red and blue polka dots.
O.P.I - Alpine Snow
Sally Hansen Insta-Dri - In Prompt Blue
Sinful Colors - New Wave
Sinful Colors - Sail La Vie
Sally Hansen Insta-Dri- Cinna-snap
Sinful Colors - Ruby Ruby
Sinful Colors - Ice Dream
Diva Couture - Silver
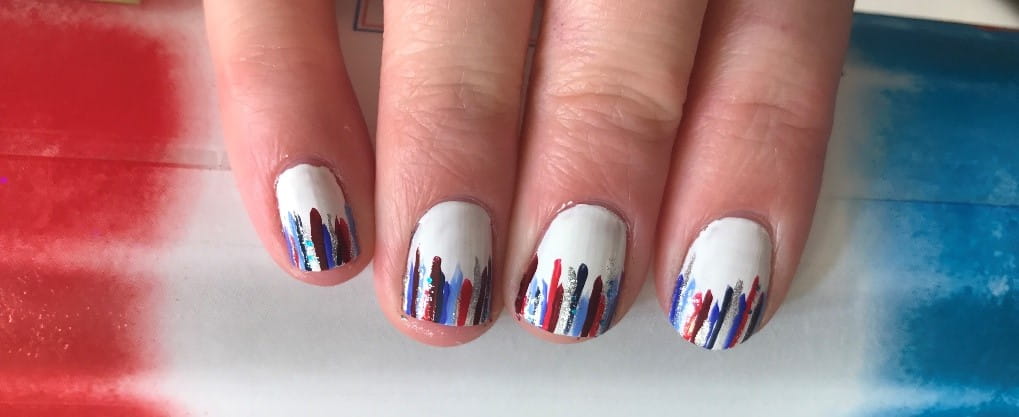
Waterfall stripes are a fun way to incorporate lots of shades of red and blue into every nail. Start with a white base, and using a thin brush, draw lines of various lengths from the end of your nail towards your cuticles.
Sally Hansen Insta - Dri Cinna-snap
Sinful Colors - New Wave
O.P.I - Alpine Snow
L.A. Girl Color POP - Celebrate
Bundle Monster Stamp Disc -BM14
Bundle Monster Stamp Disc - BM05
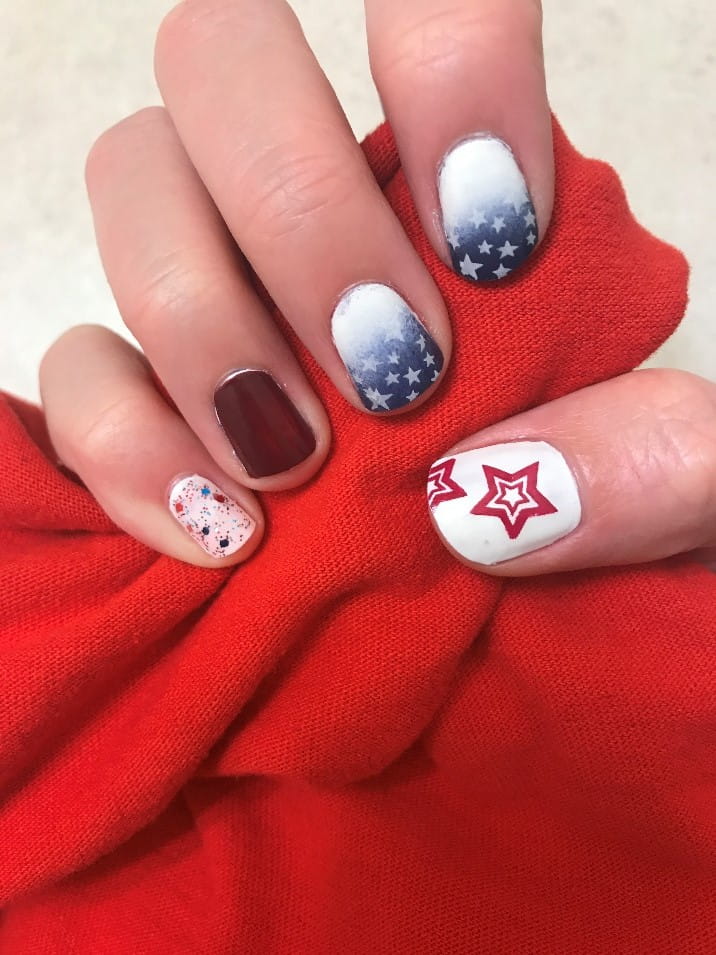
If you can’t pick just one pattern, America is diverse, and your nails can be too! Here I used a mix of glitter polish, blue and white ombre nails, and some stamped stars.
Wet n Wild Wild Shine - Red Red
Sally Hansen Insta-Dri - In Prompt Blue
O.P.I - Alpine Snow
Diva Couture - Silver
Sinful Colors - Queen of Beauty
Bundle Monster Stamp Disc - BM02
Bundle Monster Stamp Disc - BM201
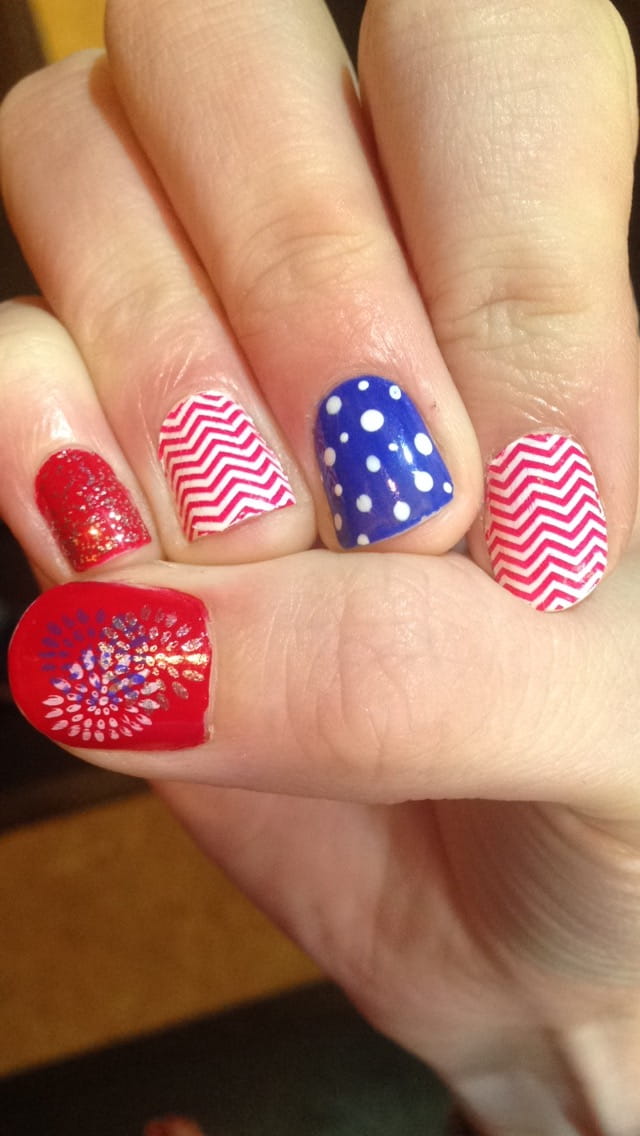
For a more classic look, stick with the most popular 4th of July symbols; stars, stripes, and fireworks. Classic doesn’t have to mean boring! Use different sized dots for stars, and chevron lines instead of straight ones.
All of the above looks can be easily completed from home with a little time and patience. Some materials that might make the job easier include a dotting tool, some thin nail brushes (for the more detailed lines), wedge applicator sponges (for the ombre look), and of course nail polish remover and cotton balls.


Tips and Tricks:
1. Make sure your base layer is fully dry before adding any details or decorations on top.
2. If you get a little polish on the skin around your nails, it can easily be taken off by dipping a q-tip in nail polish remover and cleaning up the edges, or by soaking your fingers in cold water for a couple minutes. After doing this you should easily be able to remove the excess polish with your fingernail.
3. It’s hard to do designs using your non-dominant hand. If you do the nails on your dominant hand first, it’ll be easier to make both hands match when you paint with your non-dominant hand. For example, I’m left-handed, so I paint my left hand first.
4. When doing ombre nails, some Elmer’s glue on the skin around your nails makes for very easy cleanup. Just make sure it’s dry before you start sponging!
5. You can do a lot of different things with just a few colors. Start basic. A bottle of red, white, and blue, gives you plenty of room to get creative, without breaking the bank.
Happy 4th and happy painting!
|
Related: 6 Free Things to Do This 4th of July
|

More Articles